
Maintaining a clean, comfortable, and efficient home requires more than just weekly surface dusting or keeping up with the lawn. True residential upkeep is an ongoing commitment to protecting the complex physical and mechanical systems that keep your living environment safe, warm, and dry. When routine maintenance is overlooked, small issues like minor moisture leaks, slow-draining pipes, or unserviced heating equipment can quietly escalate into severe structural damage or costly emergency repairs. By shifting your mindset from reactive fixing to proactive, scheduled care, you protect your long-term financial investment while cultivating a peaceful, healthy space for your family.
Clearing Indoor Dust and Allergen Accumulation
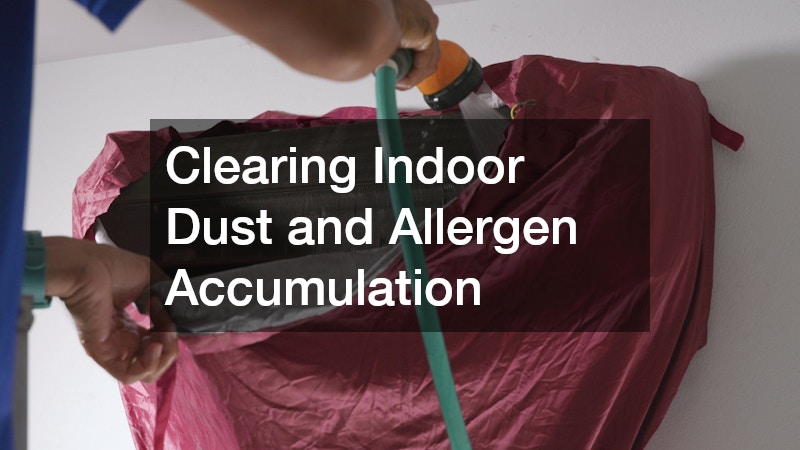
Over time, forced-air heating and cooling systems draw in dust, pet dander, pollen, and microscopic debris, distributing these particles across every room in your home. Accumulated buildup inside ductwork restricts airflow, forces your HVAC system to work harder, and significantly degrades indoor air quality.
- Change air filters regularly: Replace standard intake filters every 60 to 90 days, or every 30 days if you have pets or severe allergy sufferers in the home.
- Clean supply and return grilles: Vacuum dust buildup from metal vents and registers using a brush attachment to maintain smooth air movement.
- Schedule deep mechanical cleaning: Contact a local duct cleaner every three to five years to thoroughly extract heavy debris, dust mites, and construction dust from deep within the air delivery channels.
- Seal leaky duct joints: Use specialized foil tape or duct sealant on accessible duct connections to prevent dirty air from attic or crawl space voids from entering circulation.
- Keep floor registers unblocked: Ensure furniture, rugs, and drapes are positioned far away from supply grilles so airflow moves freely throughout each living zone.
Professional air duct cleaning removes stubborn contaminants that household vacuums cannot reach, relieving strain on your blower motor while creating a noticeably fresher indoor atmosphere.
Maintaining Fuel Systems and Heating Readiness
If your property relies on specialized fuel storage for winter heating, hot water, or cooking appliances, keeping a close eye on the storage unit is critical for both safety and continuous comfort. Fuel delivery systems require regular visual inspections to catch wear before cold weather places heavy demands on the equipment.
- Monitor fuel levels early: Check supply levels in late summer or early fall to schedule refills well ahead of peak winter demand, preventing sudden fuel exhaustion during extreme weather snaps.
- Inspect physical surroundings: Ensure a clear, safe zone of at least three feet around the tank, clearing away overgrown vegetation, dead branches, snow accumulation, or combustible materials.
- Check for structural damage: Examine the unit’s exterior for visible signs of rust, denting, pitting, or unstable support legs, and immediately report any chemical odors or weeping valves to a qualified technician.
- Schedule pre-season fuel system checkups: Have a technician perform pressure tests and check connections before the heavy heating season begins.
- Inspect shutoff valves and fuel lines: Look along exposed supply tubing for signs of wear, physical damage, or corrosion that could lead to dangerous leaks.
Proper management of a home propane tank ensures your primary or back-up heating systems remain fully operational when temperatures drop, eliminating emergency delivery fees and system shutdowns.
Clearing Heavy Drain Blockages and Pipe Buildup
While chemical drain cleaners offer a quick fix for minor sink clogs, they contain harsh corrosive materials that can deteriorate pipes over time. Furthermore, standing chemicals are ineffective against heavy, deep-seated main line blockages caused by solidified cooking fats, mineral scale, toilet paper accumulation, or intruding tree roots.
- Recognize early warning signs: Watch for multiple fixtures draining slowly at the same time, gurgling noises coming from toilets when sinks drain, or foul sewage odors near floor drains.
- Avoid hazardous chemical pour-ins: Refrain from dumping caustic store-bought chemicals into stubborn drains, as they can damage pipe linings and fail to clear thick line obstructions.
- Invest in high-pressure flushing: Hire a professional hydro jetting service to clear stubborn, recurring main-line blockages safely using high-pressure water streams.
- Perform annual video pipe camera inspections: Request a visual scan of main drain lines to detect root penetrations or crushed pipes before total blockages happen.
- Install drain strainers across all sinks: Catch hair, soap chips, and food scraps right at the drain basin to stop debris from building up in main wastewater stacks.
Hydro jetting scours the inner walls of your drain lines, removing years of accumulated grease, scale, and root intrusions, restoring your pipes to near-original flow capacity without harmful chemicals.
Upgrading Aging Water Heating Equipment
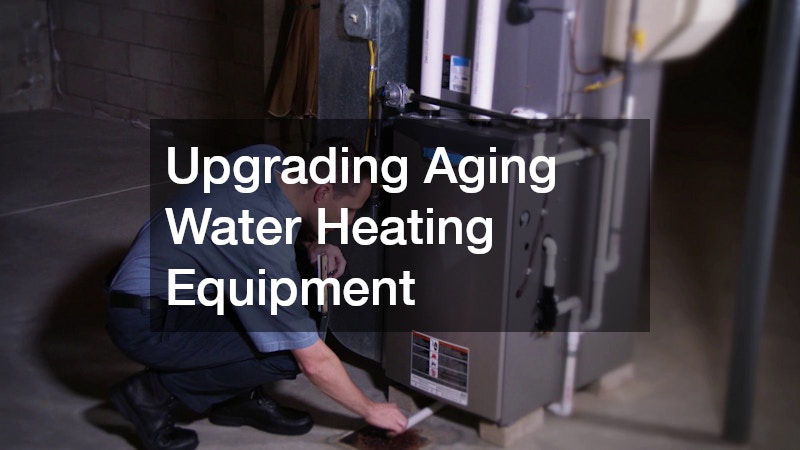
Access to consistent hot water is fundamental to daily hygiene, dishwashing, and laundry. Water heaters typically have a functional lifespan of 8 to 12 years, and operating an aging unit increases the risk of unexpected structural tank failure and major basement flooding.
- Flush the tank annually: Drain several gallons from the bottom valve each year to wash out accumulated mineral sediment, which degrades heating efficiency and accelerates tank corrosion.
- Inspect the pressure relief valve: Test the temperature and pressure relief valve periodically to ensure it releases water freely and seals tightly without persistent dripping.
- Plan for timely replacement: If your unit is over a decade old, exhibits heavy rust at the base, or produces rumbling noises, schedule a water heater installation before the tank bursts.
- Replace sacrificial anode rods periodically: Install a fresh anode rod every 3 to 5 years to protect inner steel tank walls from corrosive water action.
- Set thermostat temperatures safely: Maintain internal tank temperatures around 120 degrees Fahrenheit to prevent scalding risks while lowering energy usage.
Upgrading to a modern high-efficiency tank or tankless model restores continuous hot water delivery, improves energy efficiency, and protects your lower living levels from catastrophic flood damage.
Upgrading Faucets, Valves, and High-Use Hardware
Even a minor faucet drip can waste hundreds of gallons of water annually, driving up utility bills and leaving stubborn mineral stains on sinks and tubs. Worn valve seals or outdated fixtures should be addressed as soon as problems appear.
- Address slow leaks immediately: Replace worn washers, O-rings, or cartridges inside dripping faucets to stop water waste and prevent subtle moisture seepage beneath countertops.
- Inspect shutoff valves: Turn under-sink angle stops on and off twice a year to ensure they do not seize up, allowing you to cut off water instantly during an emergency.
- Update tired or leaking components: Modernize outdated plumbing fixtures with modern low-flow models that save water while upgrading the overall aesthetic of your kitchen or bathroom.
- Clean aerator screens regularly: Unscrew faucet aerators to wash away trapped mineral grit and restore crisp, even water stream performance.
- Check braided supply lines for wear: Replace old rubber water lines leading to faucets and toilets with durable stainless steel braided hoses every few years.
Replacing worn hardware restores smooth water flow control, updates your space visually, and prevents hidden water damage from destroying surrounding cabinetry and subflooring.
Repairing Damaged Grout and Cracking Floor/Wall Surfaces
Tile installations in bathrooms, entryways, and kitchens rely on sealed grout lines and solid backing to remain watertight. When grout cracks, crumbles, or erodes, water penetrates behind the tiles, leading to subfloor rot, structural weakening, and hidden pest attraction.
- Inspect grout lines periodically: Look closely for hairline fractures, missing grout segments, or hollow-sounding tiles along shower walls and near tub edges.
- Reseal grout annually: Apply a penetrating grout sealer once a year to prevent water, soaps, and oils from soaking into porous mortar lines.
- Replace damaged tiles promptly: Perform targeted tile replacements as soon as individual units crack or loosen, ensuring moisture cannot reach the subfloor or drywall behind them.
- Re-caulk tub and shower seams: Strip out yellowed or peeling silicone caulk annually and apply fresh mold-resistant sealant along perimeter joint changes.
- Clean grout with non-acidic formulas: Scrub mortar lines with pH-neutral cleansers so harsh chemicals do not break down protective grout sealers prematurely.
Replacing damaged tiles and renewing nearby grout stops moisture infiltration, preserving the structural integrity of underlying surfaces and avoiding full-scale wall or floor tear-outs.
Eliminating Hidden Spores and Excess Humidity Traps
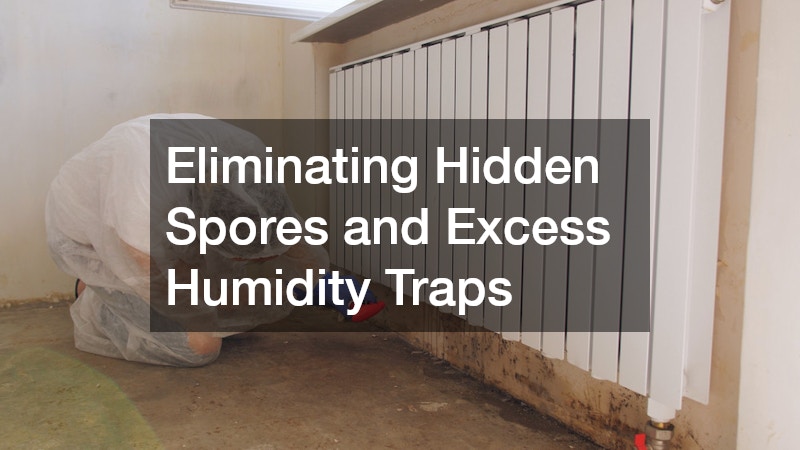
Excess moisture within walls, crawl spaces, or basements creates an ideal environment for microscopic organic growth. Persistent mold releases airborne spores that exacerbate respiratory issues, trigger allergies, and gradually destroy organic building materials like drywall and wooden framing.
- Control indoor humidity levels: Keep indoor relative humidity between 30% and 50% using dehumidifiers and exhaust fans in basements, bathrooms, and laundry areas.
- Fix structural leaks immediately: Address roof leaks, foundation seeps, or plumbing drips within 24 to 48 hours to prevent spores from germinating on damp surfaces.
- Hire licensed remediation specialists: Engage professional mold remediation services when dealing with widespread contamination exceeding 10 square feet to ensure safe, complete containment and extraction.
- Improve crawl space ventilation and vapor barriers: Lay thick plastic sheeting across exposed soil in crawl spaces to block ground moisture from rising up.
- Clean and run bathroom vent fans: Keep bathroom exhaust fans running for at least 20 minutes following showers to completely clear out residual moisture vapor.
Certified remediation professionals use negative air machines, containment barriers, and HEPA filtration to eliminate contamination safely without spreading dangerous spores to uninfected areas of your home.
Inspecting Vent Flues and Masonry Boundaries
Wood stoves, open fireplaces, and gas heating equipment require clear, intact venting pathways to vent toxic gases safely out of the home. Creosote—a highly flammable byproduct of wood burning—accumulates inside flues over time, posing a severe chimney fire hazard if neglected.
- Schedule annual safety sweeps: Have a certified technician inspect and clean your fireplace flue and venting apparatus every fall before starting your first seasonal fire.
- Check external masonry: Inspect external brickwork, mortar joints, and the top concrete cap for cracking, spalling, or missing mortar that lets rainwater enter the structure.
- Address structural defects promptly: Arrange for professional chimney repair if you discover cracked flue tiles, deteriorating mortar joints, or damaged flashing around the roofline.
- Install spark arrestors and rain caps: Keep birds, small animals, leaves, and rain out of your flue lining by securing a mesh cap over the top opening.
- Burn seasoned hardwoods only: Avoid burning unseasoned green wood or trash, which generates excessive smoke and accelerates flammable creosote build-up inside the flue.
Timely masonry and flue repairs preserve proper draft ventilation, prevent dangerous carbon monoxide backup into your living areas, and protect your roof framing from destructive chimney fires.
Servicing Overhead Entry Systems and Tension Springs
The largest moving object in most homes is the main vehicle access door. Operating under constant mechanical stress from heavy high-tension springs and motorized tracks, these systems require routine lubrication and balance checks to operate safely and reliably.
- Lubricate moving components twice a year: Apply a specialized silicone or lithium lubricant to rollers, hinges, tracks, and springs—avoiding heavy grease that attracts dirt and grit.
- Test safety reversing mechanisms: Place an object on the floor under the door path to verify that the auto-reverse sensor triggers immediately upon contact or beam interruption.
- Professional mechanical adjustments: Seek expert garage door services when springs lose tension, cables fray, or opener motors begin straining under load.
- Tighten loose mounting hardware: Check and tighten track brackets, hinge bolts, and opener support straps that vibrate loose over hundreds of daily cycles.
- Check the balance of the door assembly: Disconnect the opener pull-cord and manually raise the door halfway to confirm counter-springs hold it steadily in place without dropping.
Relying on trained technicians for high-tension spring adjustments prevents severe personal injury and ensures your main home entry system opens smoothly and securely every day.
Coordinating Multi-System Home Overhauls

While basic home upkeep—like painting, filter changes, and minor fixture swaps—can be handled directly by homeowners, major structural modifications, complete room remodels, or complex multi-trade projects demand expert oversight.
- Know your DIY limitations: Avoid taking on complex electrical overhauls, load-bearing wall removals, or full drain line re-configurations without professional training.
- Verify licensing and insurance: Always confirm that external trade contractors carry active state licenses, general liability coverage, and worker’s compensation insurance.
- Hire a lead project manager: Partner with a licensed general contractor to coordinate sub-contractors, pull municipal permits, manage build timelines, and ensure work meets local building codes.
- Establish a detailed contingency budget: Reserve an extra 10 to 20 percent of total project costs to cover unexpected structural or wiring issues uncovered during teardown.
- Write clear scope agreements: Detail every material choice, payment milestone, and labor expectation in formal written contracts before work commences.
Hiring a qualified general contractor streamlines complex home improvement projects, ensuring major structural updates are completed safely, legally, and to high standards of craftsmanship.
Creating a clean, safe, and comfortable living environment is an ongoing process that yields tremendous personal and financial rewards. By approaching home maintenance systematically—tackling seasonal HVAC servicing, keeping drains clear, addressing surface wear, and managing structural safety—you protect your household against unexpected mechanical failures and costly structural damage. Establish a rolling maintenance checklist tailored to your property, address small repairs before they expand, and partner with qualified specialists whenever a project exceeds your comfort level. With consistent care, your home will remain a resilient, functional, and welcoming sanctuary for decades to come.